I was gone yesterday to a SLC trip at the OU campus in Norman.
Monthly Archives: December 2013
Beginning of Chapter 6
Today I started working on chapter 6 of up and running with illustrator on lynda.com. First i learned how to reshape a path outline which was really easy you just use the direct selection tool to make your paths move up or down.


For the collar I used the reflect tool.the reflect tool is very easy to use you just hold the option key and click where you want it to reflect from and then figure out how you want to reflect it.


Now something that i didn’t know is when you work with paths you get these things called handles coming of your anchor point if your path is curved. i never knew the name of those. Now i do and i know how to adjust and add them. now if you have a simple two anchor line you can only move the handles into 4 different shapes if the path is connected to another path. Like this.


Now i worked on adding handles to my anchor points with a tool called the convert anchor points tool. It is in the drop down menu of the pen tool.

now another thing with handles and anchors that i thought was cool is that i used the direction handles selection then used the scale tool to make this really cool shape out of a circle.


And there you have it reshaping paths and adjusting handles and anchor points.
 before
 after
after
Chapter 5 Illustrator
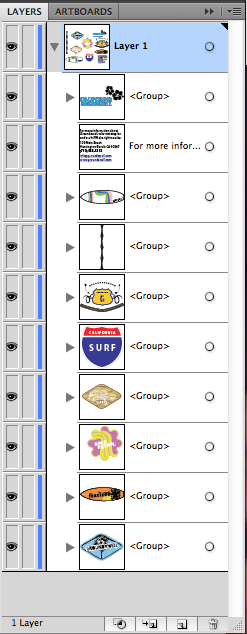
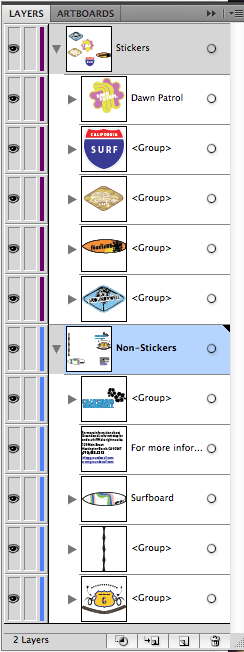
Today I finished chapter 5 of illustrator on lynda.com up and running with illustrator. In this chapter I learned how to group layers using the layers panel. you just double click the layer to rename it and then if you want to make a new group of layers you just click the little page turning key at the bottom of your layers panel and then in your group of layers you shift click the layers you would like and look for a little blue square ned to the name on the group layer. once you find it you then click and drag that square to the new layer and there you have it a new group layer.
Then I also learned how to Scale and rotate paths using the scale and rotate tools. Also i learned how to crop many paths a lot easier and faster.
 before
 after
after

Path finder is a faster and easier way to com pine paths and crop paths. first you select the paths you want to combine and then click the combine shapes button which is the second one top row. Now if you want to crop a path to another you select the paths and click the crop tool button which is the fourth one bottom row.
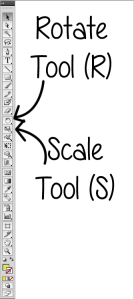
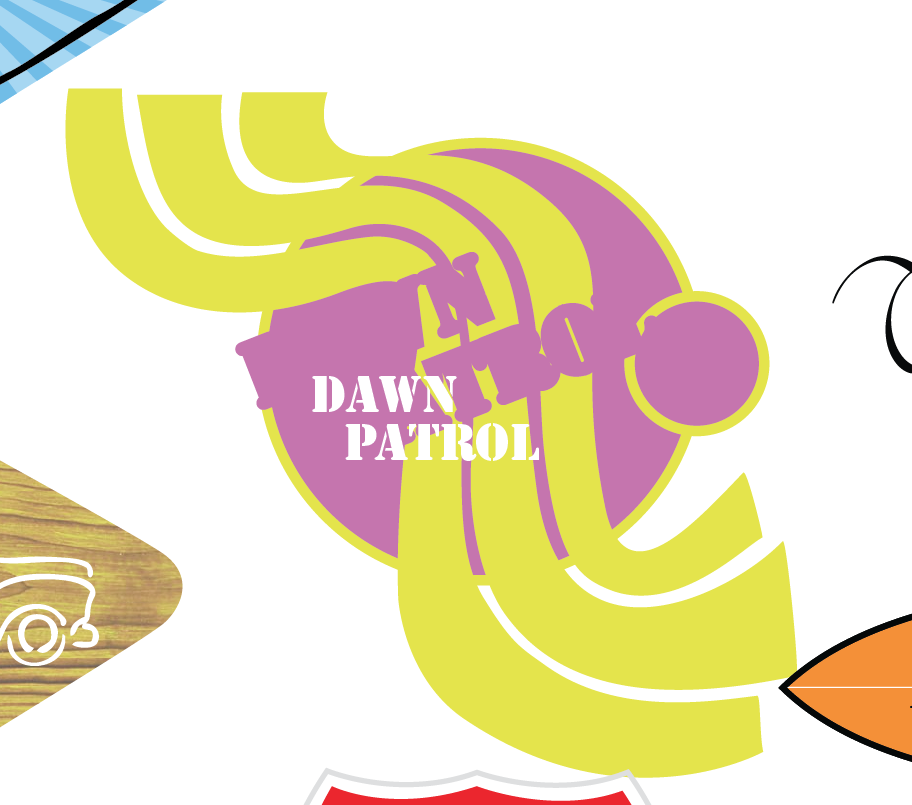
I used both tools for the text and the rotate tool for the little circles around the bigger circle. both of these tools are very easy to use. first you make an anchor point or rotate point and then you drag outside of your path to scale or rotate it.
![]()
I also took a brain bench test today over Computer Fundamentals (mac OS X 10.4) I didn’t pass. I guess I just need to keep trying.
