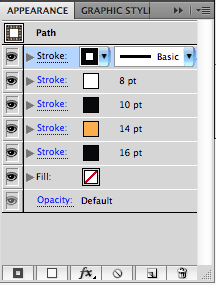
Today I worked on lynda.com lesson up and running with illustrator I completed chapter 4. Chapter 4 was about applying fills and strokes. Applying fills and strokes in illustrator is a little bit like applying them in photoshop you just have to find the right tools. The appearance window is the go to place to apply strokes and fills.
it is very simple to use all you have to do to adda fill and stroke is to click the second button on the bottom. That is the add fill but it also adds a stroke to edit. You can add stroke to many different things such as live text and regular path objects.
Another cool thing you can to is fill paths with a gradient. Gradients are really easy you just click the Gradient tool or click the G key on your keyboard and click in the object you would like to add the gradient to and then alter it from the gradient menu on the side bar.


Another cool thing is you can add different effects to your strokes such as dashes and arrows and you can also alter the width of the path with the width tool or Shift+W on your keyboard. to add the dashes you go into the appearance window and click on the word stroke to open the stroke menu.
From here you can alter your stroke in many different ways.


